
Simulating Welds Using Milliput
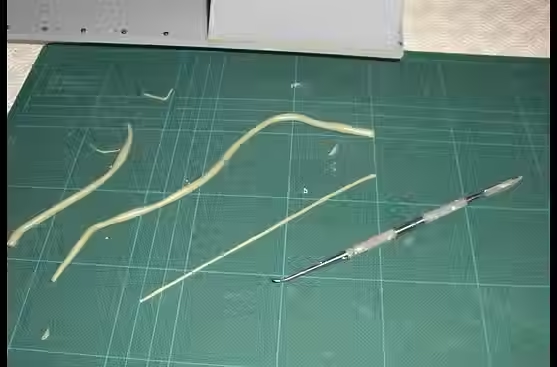

Stage 1
Mix enough Milliput (following the product instructions) for the welds you are going to add. We suggest you work in 1 hour blocks. Roll it out into a long thin strip the size of the weld you wish to create.
Stage 2
Lay it into the groove or angle you wish to simulate as a welded joint. Press it in with your finger and apply a very small amount of water if you struggle to get it to stick.


Stage 3
Once the Milliput is in place you can start to add the weld effect. I use an old dental probe with a small rounded end. The end of a paintbrush handle cut off square or a piece of plastic rod can be used to press in the weld "puddles"
Stage 4
Continue down the weld bead until you have a basic effect all the way along.
Stage 5
Once you have the basic effect start to blend the 2 sides of the weld bead into the plates. Don't worry about being too uniform as a more random effect looks best.
Stage 6
Repeat the process down all welded edges and joints. When simulating butt welded plates it is best to leave a trough in the base material to weld into, as this helps key the weld. It is also less likely to get knocked off when handling the model.
Stage 7
The finished weld bead.
If you are not happy with the weld just peel it out, roll it again and start over.
Torch Cut Armour
To accompany the weld details torch cut edges on armour plate can be simulated by just filing a random pattern of grooves into the edge of the plastic plates with a small triangular section needle file. For thicker amour laminate a number pieces then carry out the same process ensuring you have sanded the edges first to blend the lamination's. This needs to be done before you assemble your armour plates.
To simulate welds that have been painted over many times you can apply a coat of Mr Surfacer 500 to your finished welds. This is a thick paint like filler that will not hide all the detail in your weld but will "soften" the detail, fill gaps and give the effect of a heavy paint build up you won't get with just your ordinary model paints.